SimCapture On-Premise Enterprise: How to use and work with the session list
Table of Contents
- SimCapture Cloud Release Notes
- SimCapture Cloud Administrator and Faculty Help
- SimCapture Cloud Learner Help
- SimCapture On-Premise Help
- SimCapture for Skills Help
- SimCapture Mobile Camera App
- SimCapture Companion Apps Help
- SimCapture Integrations Help
- Samaritan Help
- SimCapture Cloud Use Cases
- Hardware and Network Technical Information Help
- Glossary
With the appropriate Session permissions, an Administrator can Import, Edit, Delete, or Download one or multiple sessions from the Session list.
Import a session
You can import a recorded session into SimCapture Enterprise Clous and give data tags for reporting purposes. This is useful when the capture of a session is done with portable devices not assigned to a node or recording device.
- Click Sessions on the global navigation bar and click the red Import button.
- Drag and drop your files or click Choose File.
- Complete the Summary information. A Title and an Organization are required. Note: The title will default to the current date, and the organization will default to the base organization.
- Click Save.
Edit sessions
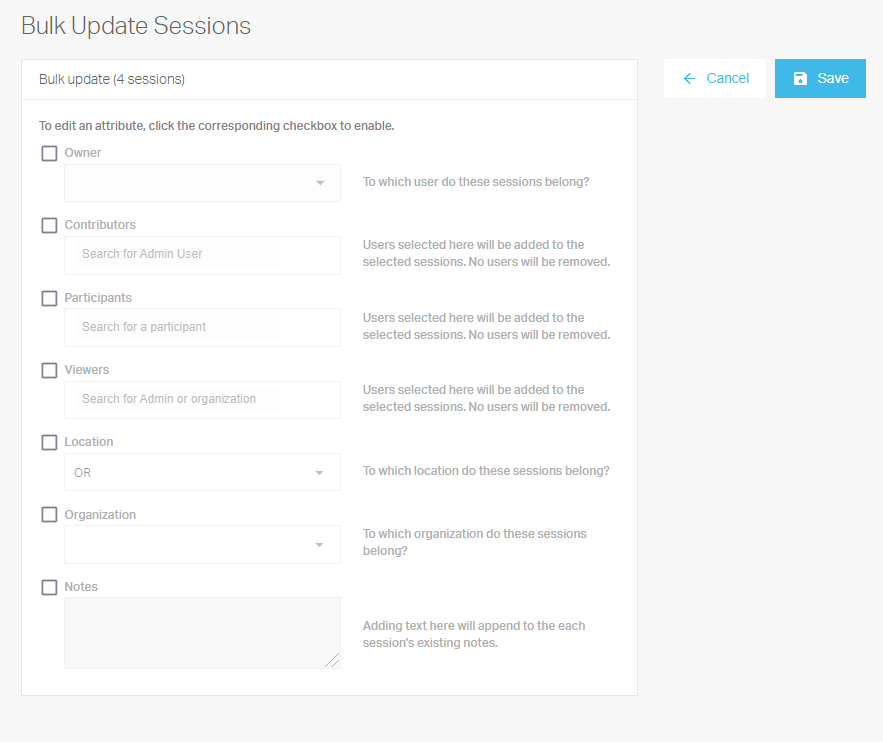
You can also bulk edit a session(s) by placing a checkmark next to the session name, clicking Edit, filling in the information on the form, and clicking Save.

IMPORTANT: If multiple sessions have been selected, the Bulk Update Session will apply the changes to ALL sessions at once.
Delete sessions
- Click Sessions on the global navigation bar.
- Check the box next to the session name that you want to Delete.
- Select Delete from the More dropdown.
IMPORTANT: Deleting a session will result in a loss of data related to the session.
Download sessions
- Click Sessions on the global navigation bar.
- Click the name of the session you want to download.
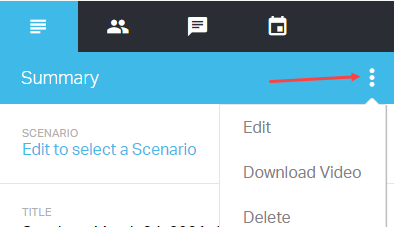
- Click the blue tab on the right side of your Session video.
- Click the kabob menu as indicated by the red arrow.
- Select Download Video.
